
A relay is used on some models to aid in hot starting. The relay intermittently provides a ground for the cold start valve while the starter is being operated. This allows the cold start valve to spray fuel at regular intervals so that the engine starts quickly.
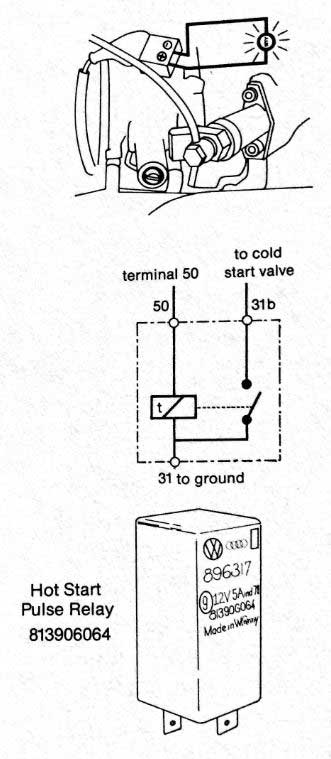
Checking Operation of Hot Start Pulse Relay
- Remove electrical connector from cold start valve
- Bridge connector terminals with a test light
- Ground the coil high tension wire
- Operate starter
- Pulse relay is OK if test light flashes on and off at regular intervals
If pulse relay is not installed see pages 37-40 for relay installation procedure
If hot start pulse relay is installed and hot start problem still exists – see page 41
Suggested Repair Time
- Check Hot Start Pulse Relay = 10 time units
Hot Start Pulse Relay – Installing
1980 VW Pickup, Audi 4000 & 5000
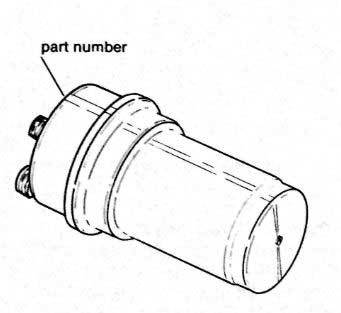
- Install Hot Start Pulse Relay #813 906 064 (Wiring harness has been installed by the factory.)
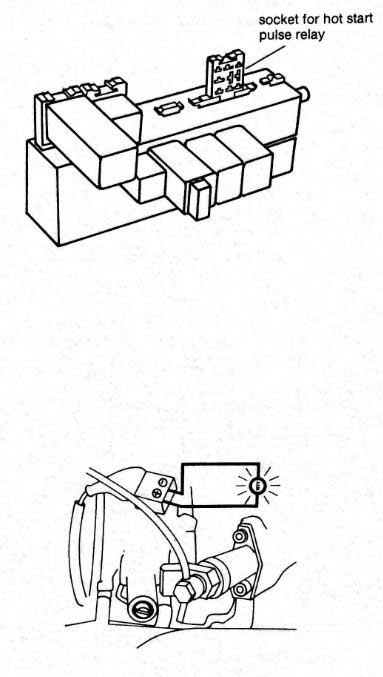
- Remove underdash trim.
- Install pulse relay in unoccupied socket on top of fuse/relay panel.
- Reinstall underdash trim panel.
- Check Operation of Hot Start Pulse Relay
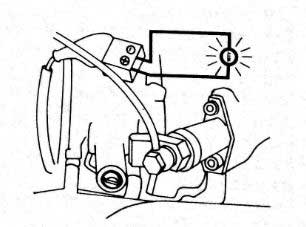
- Remove electrical connector from cold start valve
- Bridge connector terminals with a test light
- Ground the coil high tension wire
- Operate starter
- Pulse relay is OK if test light flashes on and off at regular intervals
- Suggested Repair Time
- Install and Check Hot Start Pulse Relay = 20 time units
1980 VW (except Pickup, Dasher and Early Rabbit)
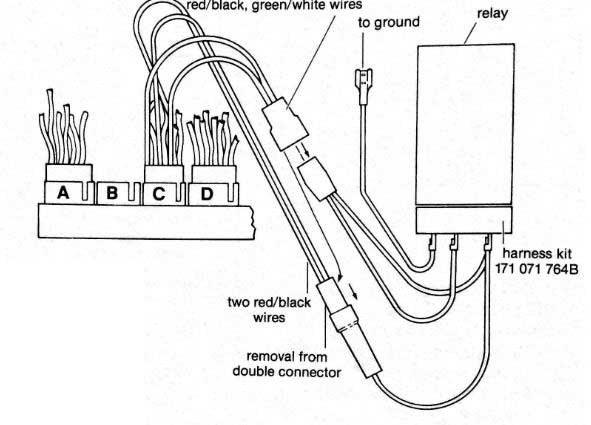
- Install Harness Kit #171 971 764B and Install hot start pulse relay #813 906 064
- Disconnect battery ground strap.
- Remove underdash trim.
- Remove fuse/relay pane from bracket.
- Locate double connector with double red/black and double
green/white wires which attaches to a single connector with double red/black wires. - Connect brown wire from the harness kit to ground point under the dash board.
- Install relay socket to any convenient location on top of fuse/relay panel.
- Plug in pulse relay.
- Reinstall fuse/relay panel, underdash trim and battery ground strap.
- Check Operation of Hot Start Pulse Relay
- Bridge cold start valve connector terminals with a test light
- Ground the coil high tension wire
- Operate starter
- Pulse relay is OK if test light flashes on and off at regular intervals
- Suggested Repair Time
- Install and Check Hot Start Pulse Relay = 20 time units
Early 1980 US Rabbit and pre-1980 VW & Audi
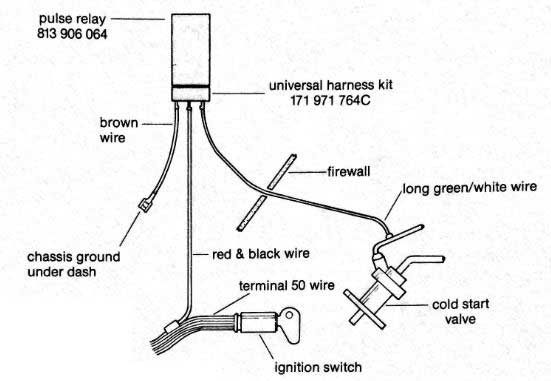
- Install Universal Harness kit #171 971 764 C and Pulse Relay #813 906 064.
- Disconnect battery ground strap.
- Remove underdash trim.
- Remove fuse/relay panel from bracket.
- Connect red/black wire from harness kit to terminal 50 wire of ignition switch where ever convenient using parallel connector
(3M or similar). - Route long green/white wire from harness kit through firewall and connnect to green/white wire at cold start valve using parallel connector (3M or similar).
- Connect brown wire from harness kit to ground point under dash board.
- Install relay socket on tpp of fuse/relay panel at convenient location.
- Plug pulse relay in socket. — Reinstall fuse/relay panel, underdash trim and battery ground strap.
- Check Operation of Hot Start Pulse Relay
- Bridge cold start valve connector terminals with a test light
- Ground the coil high tension wire
- Operate starter
- Pulse relay is OK if test light goes on and off at regular intervals
- Suggested Repair Time
- Install and Check Hot Start Pulse Relay = 20 time units
1980 Dasher
- Install Harness Kit 171 971 764/B and Pulse Relay 813 906 064
- Disconnect battery ground strap.
- Remove under dash panel.
- Remove fuse/relay panel from bracket.
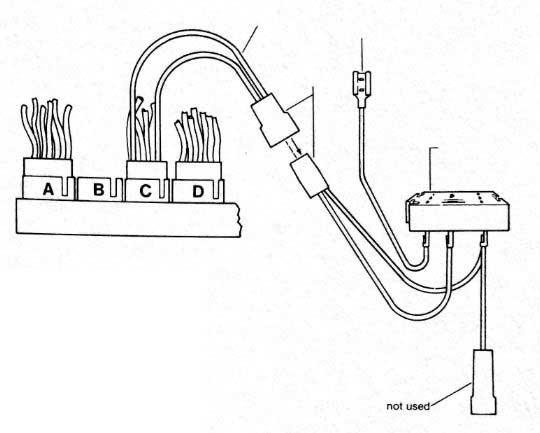
- Locate white multi-pin connector that is plugged into socket C at rear of fuse/relay panel.
- Locate double female connector with red/black and green/white wires which leads from socket C.
- Plug harness kit double connector to this double female conector.
- Connect brown wire from harness kit to underdash ground point.
- Single connector on harness kit is not used.
- Install relay socket on any availabvle spot on top of fuse/relay panel.
- Plug pulse relay into socket.
- Reinstall fuse/relay panel, underdash trim and battery ground.
- Check Operation of Hot Start Pulse Relay
- Bridge cold start valve connector terminals with a test light.
- Ground the coil high tension wire.
- Operate starter
- Pulse relay is okay if test light flashes on and off at regular intervals
- Suggested Repair Time
- Install and Check Hot Start Pulse Relay = 20 time units
3-Bar Fuel Accumulator
A 3-bar fuel accumulator is now installed in production. This accumulator, #431 133 441C, can be installed on earlier cars to aid hot starting.
Only install the 3-bar accumulator, if a hot starting problem continues to exist after performing all the checks in this booklet, and after installing the hot start pulse relay.
NOTE: when the 3-bar accumulator is used, the engine must
have fuel injectors with a production number of 829 or higher.
 A new accumulator was installed in production as of the following
identification numbers:
- Rabbit – VIN 17A 0864 787
- Dasher – VIN 32A 0000 001
- Jetta- VIN 16A 0375 455
- Scirocco – VIN 53A 0049 928
- Convertible – VIN 15A 0809 235
- Audi 4000 – VIN 81A 009 5001
- Audi 5000 – VIN 43A 003 9552
Leakage test pressures for the new fuel accumulator are:
- After 10 min. – 2.6 bar (37 psi) minimum
- After 20 min. – 2.4 bar (35 psi) minimum